 Back to psychWithJava page
Building projects with Eclipse
This section explains how to build projects using psychWithJava
and Eclipse. Applies to all OSs. Note: the newest
version of Eclipse is 3.2 but the screen shots below
are from version 3.1. However the instructions should apply
equally to the newer version.
I will demonstrate how to build a project using psychWithJava
package with an example.
Download HelloPsychophysicist.java
and the auxilary image files
psychophysik.png and
fechner.png to your local disk.
Start Eclipse.
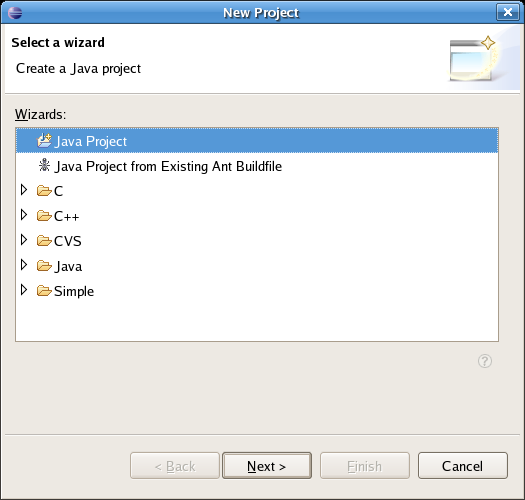
Click File -> New -> Project.
Choose Java Project in the
"New Project" Window, click "Next".
"New Java Project" window should appear. On that window
check the "JDK compliance level" and make sure that it
is set to 5.0.
If it is not, then you have to configure the default. If it is
set to 5.0 you can skip the following instructions and go to next
step.
In "New Java Project Window", click on
"Configure default" (or "Configure JRE")
within the "JDK compliance level"
frame (or "JRE" frame).
"Preferences" window should appear,
using it set the "Compiler compliance level" to 5.0.
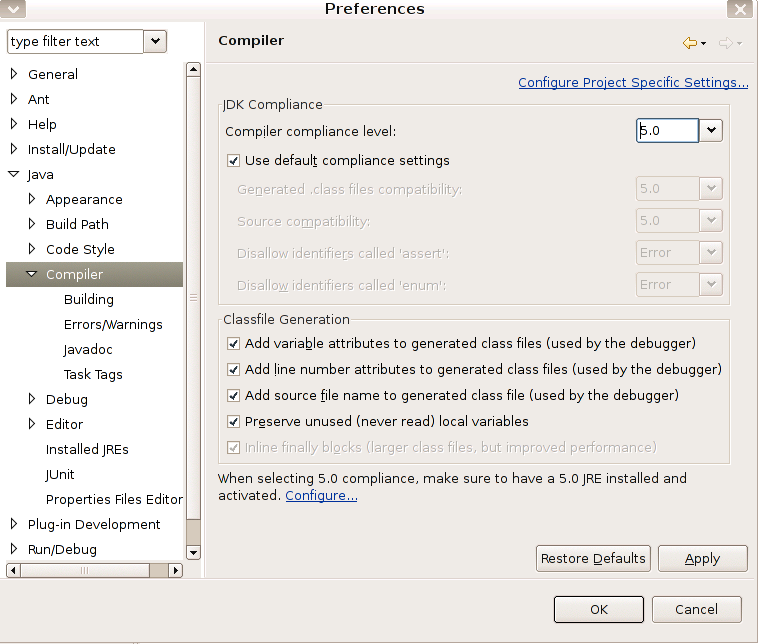 In case 5.0 is not listed among the available compilers,
you may have to update your configuration. In anycase, either
5.0 was available or not,
follow the "configure" link near the bottom of the Preferences window.
"Preferences" window with Installed JREs will appear.
In case 5.0 is not listed among the available compilers,
you may have to update your configuration. In anycase, either
5.0 was available or not,
follow the "configure" link near the bottom of the Preferences window.
"Preferences" window with Installed JREs will appear.
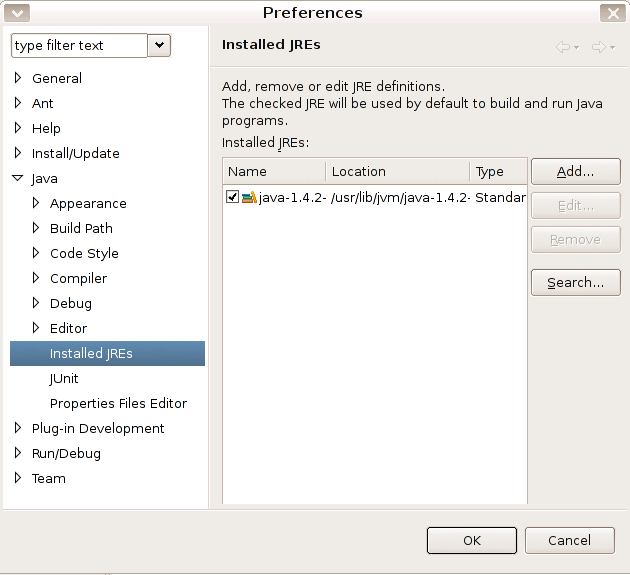 Check the box next to JDK 1.5 in the installed JREs list.
If JRE 5.0 (or 1.5)
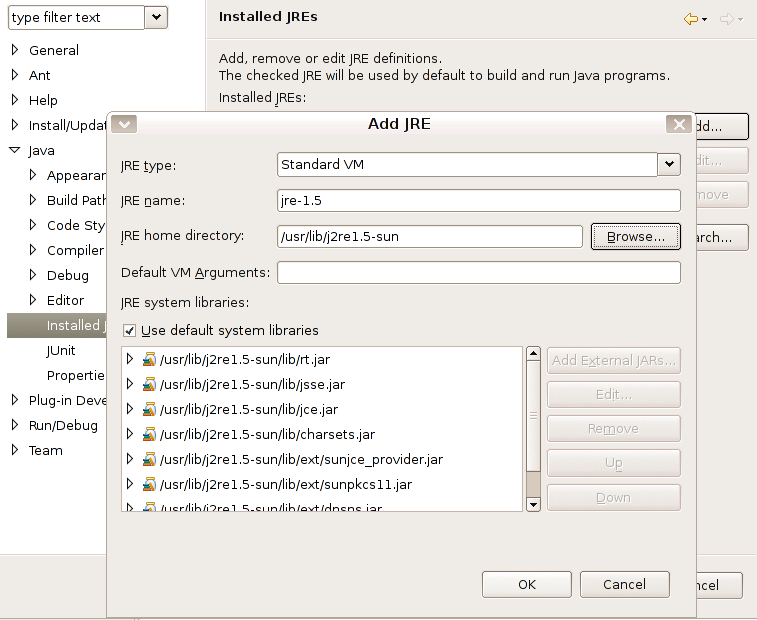
is not among the installed JREs, click on Add button and
add the directory where JRE 5.0 is installed.
Check the box next to JDK 1.5 in the installed JREs list.
If JRE 5.0 (or 1.5)
is not among the installed JREs, click on Add button and
add the directory where JRE 5.0 is installed.
 Before clicking OK on the "Preferences" window,
make sure that the box next to JDK 1.5 is checked
(Linux users: I recommend installing and using JRE 1.6
on Linux systems).
Now the "default compiler compliance level" should
seem to be 5.0 on the "New Java Project" window.
Before clicking OK on the "Preferences" window,
make sure that the box next to JDK 1.5 is checked
(Linux users: I recommend installing and using JRE 1.6
on Linux systems).
Now the "default compiler compliance level" should
seem to be 5.0 on the "New Java Project" window.
In the "New Java Project" window,
click on the radio button next to "Create
project from existing source".
In the text field next to Directory
enter the path to the directory where you placed the
files that you just downloaded (HelloPsychophysicist.java
and the image files).
Give a name to the project (top text field) and click Next.

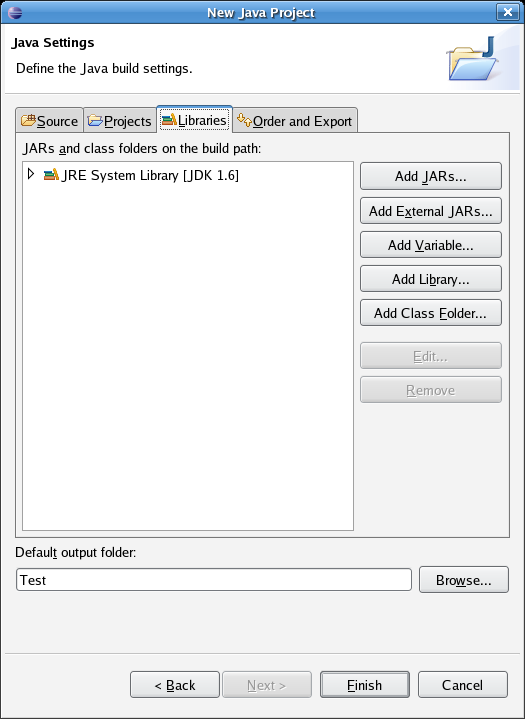
In "Java Settings" click on the "Libraries" tab. Then click on
"Add variable".
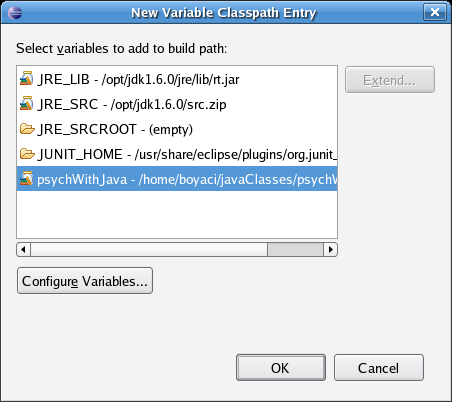
Highlight "psychWithJava" in the "New Variable Classpath Entry"
window. Click OK. (You must have set
up Eclipse to include
psychWithJava package, if you haven't
followe the instructions on
Preparing Eclipse for pure Java development.)
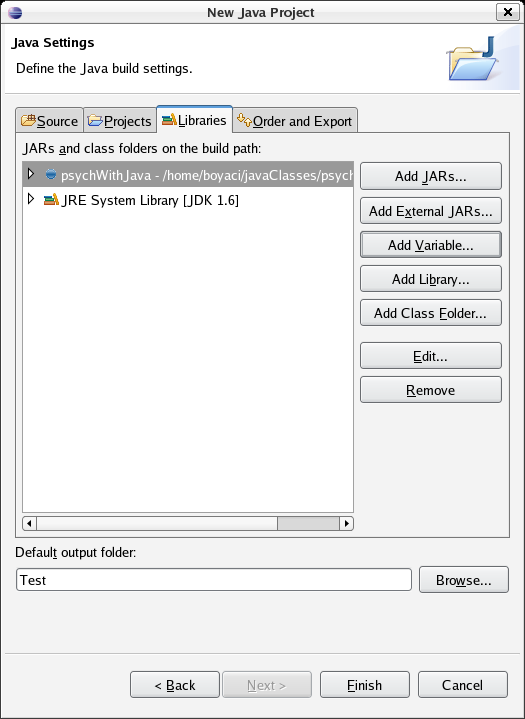
Back in the "New Java Project" window you should now see
"psychWithJava" in the build path list. Click Finish.
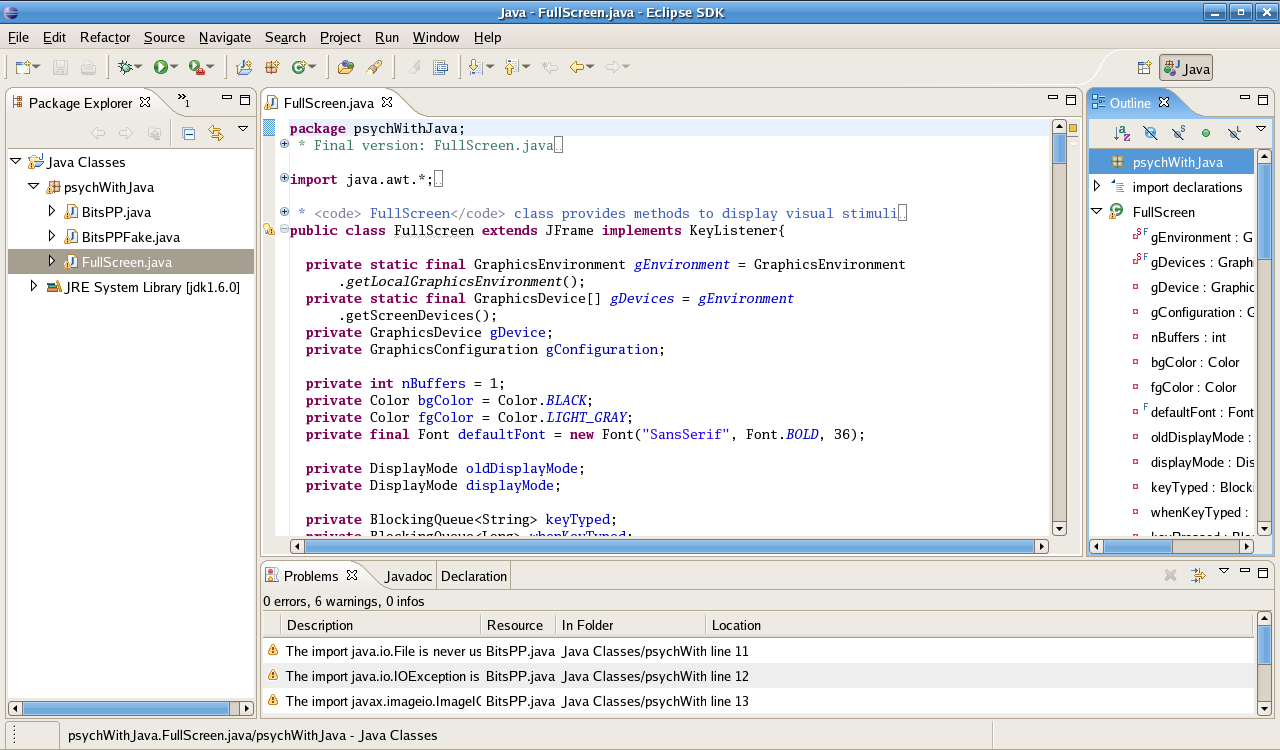
Now your project is created, and you should see a
screen similar to the one below.
(Note: to open and inspect any one of
the programs in the "Editor" pane,
simply double click on the file in the "Package Explorer"
pane on the left hand side)
Inspect the HelloPsychophysicist.java file.
To be able to use psychWithJava package you have to include an
import statement
Find that statement near the top of the file.
Running
To run the HelloPsychophysicist example, right click on
the file in the "Package Explorer" pane (CTRL-Click on Mac
OS X) and choose Run As -> Java Application.
Back to psychWithJava page